Official Page Launch February 2nd 2018!!!


© 2018-2019 Desert Fabworks LLC - CNC Plasma Info, All Rights Reserved- Trademarks shown on this site belong to their respective owners


Plasma tables come in all shapes and sizes and it can be difficult to tell the good from the bad just by a picture. Lets start by breaking tables down into a few simple groups and defining some terms.
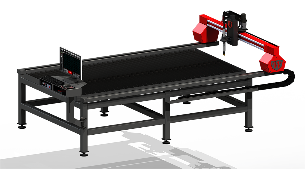
Tables Sizes - Tables for the hobby, general fabrication, and light industrial come in a few common sizes: 2x2, 4x4, 4x8, and 5x10 feet. These sizes coincide with common steel sheet sizes being 4x8 and 5x10 feet. Larger industrial tables can be configured to nearly any size the customer needs.
I have a lot of people ask what size table should I get? This is difficult question and you need to really think about this one. The cost difference between sizes is relatively small. Most of the cost is in the electronics, controllers, software, computer, and plasma cutter, the components that all the sizes have in common. I try to steer people away from the 2x2 table. Its so small and easily outgrown after a very short period. I hear so many people say I’m only going to cut these small widgets so I don't need a big machine. After a couple weeks of cutting they realize how amazing CNC Plasma cutting is and they want to make a million other things but they have a 2x2 table and are stuck. Unless your on a submarine I would skip this size. When it comes to size really consider what you want to do and what you may do in the future. If you buy one size bigger than you think you will need your probably going to be pretty safe. One quick note on Indexing sheets - this is where for example you have a 4x4 table and need to cut something that is 4x8. You can index or move the sheet on your table to allow this to happen. It is possible to make this happen but its has the potential to go bad in a hurry if your are not very careful and very precise. .1 in off in any direction and ruin a cut. This should be a once in a great while operation. If you have the though of doing this on a regular basis buy the 4x8 and save yourself a ton of headaches.
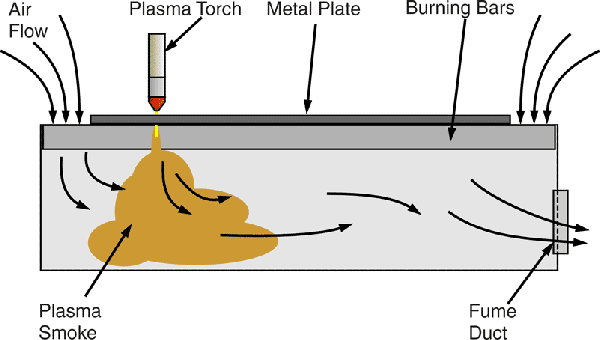
Water table - A water table is one that has water under your cutting slats (the pieces of metal the sheets your cutting sit on). The water is there to serve several purposes. The plasma stream is vaporizing metal and the process generates a fine metal dust. This dust can and will get on and coat everything in your shop. The water is there to help capture this dust and the smoke generated from the cutting process and keep it from going all over your shop. It also helps cool the material being cut to reduce warping during the cut. And it helps cut down the noise a bit. Water Table vs. Down Draft Check out this info. If you select a water table like we did check out our water treatment page to get more info on how to maintain your water table and what chemicals to use in it. Water Treatment Page


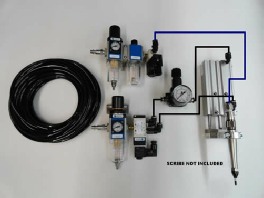
Example of an air scribe setup that would be mounted next to the plasma torch on the gantry
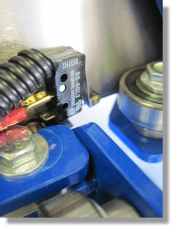
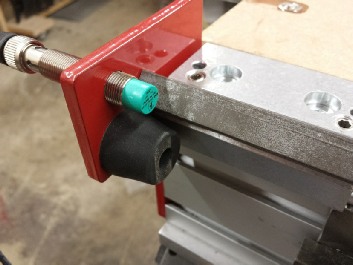
Proximity Style Limit or home switch
Limit or home switch that activates with contact from another part of the machine
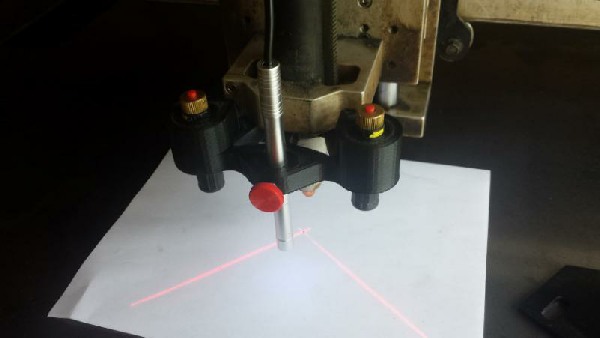
DIY Laser Cross hair system mounted to the torch
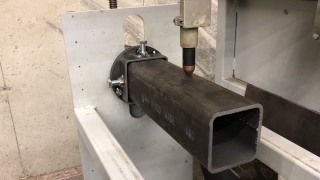
Plasma Rotary Tube indexer, Round tube or pipe rotaries are more common and easier to make. Square, rectangle and angle iron rotary attachments are usually only found on the high end machines or purpose built system.

Down Draft Table - A down draft table has an enclosed base under the cutting slats and uses an exhaust fan to pull the smoke and dust down and out of the shop.
Open Table - In this configuration there is nothing under the slats but usually ground or sometimes a dry try for catching small parts. The metal dust and smoke are free to go where they will and will quickly fill your shop with smoke and coat every surface with a fine metal dust.
Turnkey - You can opt to buy a table turnkey ready to cut from many manufactures these days. Most of the high end tables are turnkey due to the advanced components and precision needed during manufacturing and assembly. This is a great option if you do not want to build your own or lack the time, skill or equipment to build a table. This tends to be the most expensive option as well.
Kits - There are many companies that will sell you a table in kit form that you assemble. Some allow you to pick options and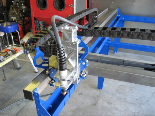 components some are set. Going this route you could buy a table kit from one manufacture, an electronics package from another, add a plasma cutter and software and some time and you could build your own but without all the welding and fabrication of a build your own system. There is definitely some skill and time involved in going this route and you will need to to have some basic skills or the willingness to learn. Make sure all of your components are designed to work together if your purchasing things from different manufactures. This option will give you a great understanding of table design and how all your systems work and will save you lots of money but it will come with some frustration and a steep learning curve.
Build your own - This tends to be the least expensive option but requires the most work and skill. There are plans and component kits available from many sources to allow you to build your own table from scratch or semi scratch by purchasing a gantry kit. This option is not for the faint of heart and will require a lot of time and research to make sure that everything is done correctly. This can be the least expensive option or the most expensive option should things not work out. Definitely do you homework before choosing this option.
Steppers or Servos? - This is another highly debated topic. There are pluses and minus on both sides and many things to consider. My first two tables used Steppers and My new Westcott CNC Plasma Table uses Servos. Check out this link for a in depth comparison between the two: Steppers vs. Servos
Stepper Motor - A stepper motor is a special type of electric motor that moves in increments, or steps, rather than turning smoothly as a conventional motor does. The size of the increment is measured in degrees and can vary depending on the application. Typical increments are 0.9 or 1.8 degrees, with 400 or 200 increments thus representing a full circle. The speed of the motor is determined by the time delay between each incremental movement.
Inside the device, sets of coils produce magnetic fields that interact with the fields of permanent magnets. The coils are switched on and off in a specific sequence to cause the motor shaft to turn through the desired angle. The motor can operate in either direction (clockwise or counterclockwise). When the coils of a stepper motor receive current , the rotor shaft turns to a certain position and then stays there unless or until different coils are energized. Unlike a conventional motor, the stepper motor resists external torque applied to the shaft once the shaft has come to rest with current applied. This resistance is called holding torque.
Servo Motor - A servomotor is a rotary actuator or linear actuator that allows for precise control of angular or linear position, velocity and acceleration.[1] It consists of a suitable motor coupled to a sensor for position feedback. It also requires a relatively sophisticated controller, often a dedicated module designed specifically for use with servomotors. Servomotors are not a specific class of motor although the term servomotor is often used to refer to a motor suitable for use in a closed-loop control system. Servomotors are used in applications such as robotics, CNC machinery or automated manufacturing.
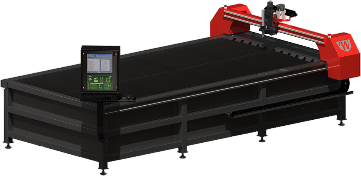
Frame Design - Two be very general Plasma tables can be broken down into two basic categories for frame design - Bolted or Welded. With a bolted frame system the machine is made up of many components all bolted together to create the finished frame. You see this most often in kit systems because it easy to ship and build. The kits can be formed or cut pieces or extruded aluminum as in 80/20 Aluminum extrusion. Bolted systems are easy to ship, quick and simple to build and setup and rarely require advanced fabrication skills or welding. The speed and easy of assembly do come at a cost. They are usually less rigid and light allowing them to flex or move during cutting. The bolted systems tend to be seen most in hobby or lower end machines. Welded frame systems can come in the form of plans as part of a kit or build your own system or as turn key fabricated table system. These frames are heavy duty, rigid and designed for heavier fabrication work. Expect to see welded frames in your higher end tables. My first table was a custom welded 4x4 frame, Second table was a bolt together kit system. For this third table I went with a turnkey welded table system. My business is growing and I needed the precision, rigidity and durability that the welded frame offered. The Westcott Table is welded in their facility in precision jigs. I got to see the build process and was very impressed by the quality and strength of their tables.
Gantry - The gantry on the table is the cross bar that holds the torch assembly and moves around the table. Plasma is a non contact cutting process compared to a router where you have contact between the bit and the material. In plasma you want a rigid gantry that does not have flex and is true and square so that you can maintain accuracy. For the plasma torch to provide the best quality cut you need to maintain cut height and the correct speed for the material and power. If you have a very heavy gantry your ability to maintain speed when changing direction and doing curves will be reduced and your cut quality will suffer. Think of it this way. Its really easy to move your hand around quickly and smoothly. Hold a 20 lb dumbbell and try to do the same thing, not so easy. To get the plasma table to perform at its best you need to have a gantry that is as light as possible while maintaining square ness and accuracy. If you have to add weight to achieve this you need to make sure you select the right size motors to manage the weight properly to maintain the ability to maintain cut speed. A design that can manage all of these factors will provide the best possible cuts.
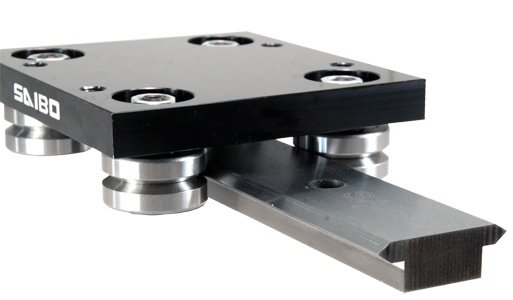
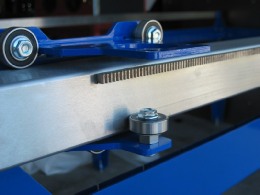
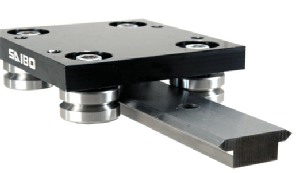
Linear guides and bearings - This is an area of table construction that can really separate the tables in terms of quality and precision. The gantry and torch assembly move around the table to do the cutting and to move and provide the best quality cut possible they need to move smoothly and accurately. Most often this movement is done using bearings. How the bearings mount and what they run on varies greatly. Plasma cutting is not a pristine clean process and dust and dirt are always present. The bearings or guides must be able to deal with this and still maintain a perfectly smooth and accurate ride for the moving components. Cutting accuracy and performance can be directly linked to this part of the table. Linear guides run along extruded or machined rails and maintain a much higher degree of accuracy compared to a bearing rolling on a piece of metal plate or extusion. The linear guides also usually have “wipers” to keep the debris from getting inside them and affecting accuracy. This component of the table separates the hobby from the industrial precision tables. This is one thing to look at when deciding on a table. Below are some examples and you can see why linear guide system are more accurate and provide better cutting results
This design of bearing on a rail or bearing on a piece of cold rolled steel is common place in the less expensive tables.
V Groove Rails and bearings are a step up from the bearings on rails and have better precision.
This is a picture of the WestCott Pro Series table system with 35mm Precision Speed guide rails with 6 roller bearings per side.
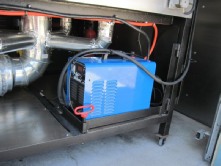
Electronics Package - The electronics package really ties all of the mechanical components together and makes it all work. In turnkey and most kit tables the electronics package is closely tied to the software that operates the machine. In a build your own situation you can go just about any route you want, but….. Its best to stick with what software the kit or component manufacture offers or recommends. Often when you start sourcing components from a multitude of vendors when something goes wrong there is no one single source to turn to and I have seen many people get stuck in a finger pointing game where each vendor blames another for your problems. The electronics and software is where I see people struggle the most and where your most likely to have problems. Troubleshooting mechanical problems is fairly simple but but electronics troubleshooting can leave you very frustrated.
For build your own and some of the kits out there your likely to see GeckoDrive Kits for the steppers. These run your stepper motors and can then be connected back to a computer through a parallel port which is something you do not find on most new computers today so keep that in mind. When it comes to software for these most often you will see them using MACH3 to control the steppers and SheetCAM or another CAM software to control the cut paths. For a full breakdown on software see the SOFTWARE PAGE.
For many of the kits and a lot of the build your own a very popular option is the packages from
Flashcut CNC, they offer Software that integrates your CAD - “Design Software”, CAM - The “
tool path software” and the CNC Control software that actually tells the steppers or servos what
to do, where to go and the torch when to fire and for how long.
For my newest machine I went with Design2Cut Software which is a proprietary version of the
Flashcut Software, it has a lot of custom features and intuitive design components that make it better
than the other versions. My machine will also operate using the iCNC controller from Thermal
Dynamics. This controller is a true high end industrial grade control system which is purpose built
for plasma cutting and has many features and options your not going to find in a hobby grade or
light production grade table.
One of the features your going to want to make sure you have is Torch Height Control or THC. In
Simple terns, torch height control is software management of the height of the torch over your
material cutting. Typical torch tip to material or “work” is 0.06 inches or 1.5 mm. This is a
very small gap that needs to be maintained with absolute precision in order to maintain accurate
and quality cutting results. Plasma Cutting is a no contact operation unlike a router or mill. If the
Plasma torch comes in contact with the work surface at any point it can throw off the cut as well
as all the cuts after that point by moving the material or causing the torch to loose its position on
the table. When you consider that you are trying to maintain a 1.5 mm gap at speeds up to 300
Inches per minute or faster across a 4x8 or 5x10 work surface there is no margin of error. That is why
its critical that you have Torch Height Control that is accurate and can keep up with the machine and adjust to the contours of the steel while cutting and maintain the proper cut height. Steel can flex dramatically during cutting due to the heat.
Most machines these days come with some form of THC and there are several companies that make add on THC modules for kit or DIY tables. My first table did not have THC and it was very frustrating when a collision would occur or the material would warp and not get cut cleanly or completely. I would consider THC as a mandatory option on any table.
Table Options & Accessories - We live in a world driven by accessories and add-ons. When it comes to Plasma cutting there are a hand full of options and accessories you will see. Lets start with limit and homing switches. Nearly all of the software and control systems are designed to work with these components but not all tables have them. Limit switches are switches that can be simple arm activated or more complex proximity style. They are located at the ends of the gantry and table and also sometimes on the Z axis where the torch mount and they are designed to keep the motors from driving too far or doing damage should settings not be correct or if something should go wrong. When the limit switch is activated it can shut off the torch and stop the motors to prevent damage to the components. Homing switch's are designed to bring the gantry back to the same location “reference location” every time. They are fixed and the machine moves till it contacts these switches. When contacted the machine then can reference where its at on the table and Zero its self out. Having homing switches that are accurate can be very beneficial if you have a problem during and cut and need to get back to a point on the table to start again.
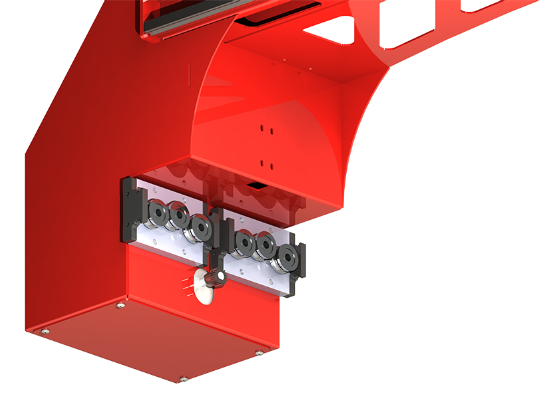
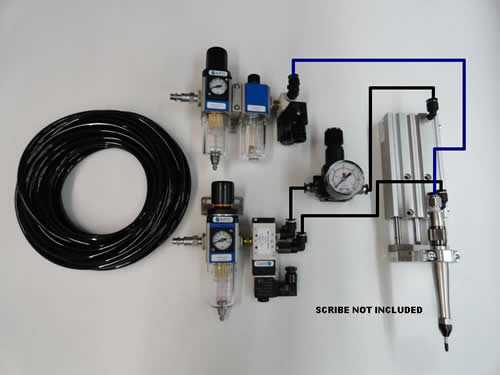
Lasers, Many machines have a laser dot or a laser cross hair that can be used to visually reference where the torch will fire. The laser pointer can aid you in being able to line up a point on a jig or when cutting tube or other products with a defined point that you can reference and start from. Air Scribes, a pneumatically driven scribe with a diamond or carbide tip and are used both for artwork and for marking locations on the surface your cutting for writing text and part numbers.
With Plasma like many other things as quality
increases so does the price, and the same goes for accessories. Determining what you need now as well as in the future is very important.